


Ensuring the property you’re about to purchase is in its promised condition is a crucial part of a smooth home‑buying journey. Your final inspection before settlement is the last opportunity to verify that everything is in order before ownership officially transfers. By taking this step seriously, you can avoid costly surprises, ensure repairs have been completed, and confidently proceed with settlement knowing the property meets your expectations.
What is Final Inspection Before Settlement?
A final inspection before settlement is an essential step that allows buyers to check that the property is in the same—or better—condition than when the contract was signed. It ensures that the seller has upheld all agreed‑upon terms, including completing repairs, leaving included fixtures, and maintaining the property’s condition.
This walkthrough is not a general visit; it’s a structured assessment. Many buyers refer to their building inspection report or contract while conducting the inspection to ensure consistency. Completing this step reduces the chances of unexpected issues after the settlement has been finalised.
Why Is Final Inspection Crucial for Buyers?
A final inspection is your last safeguard before you commit to the biggest financial purchase of your life. Skipping it can expose you to avoidable risks, including:
- Undisclosed or new damages
- Missing fixtures or appliances
- Uncompleted or poor‑quality repairs
- Pest issues that may require expensive treatment
By completing a thorough final building inspection, buyers ensure they aren’t inheriting the seller’s unresolved problems. It’s your final checkpoint before signing off on the property and proceeding confidently with settlement.
When Should the Final Inspection Be Done?
The ideal time to schedule the final inspection before settlement is within the last week leading up to the settlement date. Most buyers carry it out 1–3 days before settlement, giving enough time to raise any concerns and negotiate solutions with the seller if needed.
It’s best to avoid conducting it too early. Issues can arise between the time the contract is signed and the day the seller vacates, so scheduling it close to settlement offers a more accurate assessment of the property’s final condition.
Steps to Conduct a Building Inspection
A final inspection is more than a quick walkthrough; it’s a structured assessment. Refer to your building inspection report, the sale contract, and any documents outlining agreed repairs. The steps below help ensure you don’t miss any essential details.
1. Inspect the Property’s Condition
Start with a general visual assessment of the entire home. Look for:
- New damages that weren’t present earlier
- Cracks in walls, ceilings, or flooring
- Water stains or leaks
- Signs of mould or dampness
- Broken fixtures, windows, or doors
Even minor issues may become expensive headaches later, so document everything as you go.
2. Verify Fixtures and Appliances
Your contract typically lists fixtures and inclusions meant to stay with the property. During inspection:
- Turn on all appliances (oven, stove, dishwasher, rangehood)
- Check that air-conditioning units function
- Ensure all lights, taps, fans, and heated towel rails work
- Confirm blinds, curtains, and fittings are still in place
If anything is missing or appears substituted, raise this immediately.
3. Review the Contract and Agreed Repairs
Your contract may state repairs the seller agreed to complete. Compare the completed work with:
- Quotes or receipts from trades
- Previous inspection notes
Ensure the repairs aren’t just completed—but completed properly.
4. Check for Pest Infestation
Termite and pest issues can be costly and sometimes hidden. During inspection:
- Look for termite mud tubes and damaged timber
- Check cupboards, skirting boards, and dark areas
- Ensure the seller completed any agreed pest treatments
If you suspect issues, consult your pest inspector or consider a re‑inspection.
5. Ensure All Utilities Are Functional
The property should be fully operational at settlement. Test:
- Hot and cold water
- Gas connections
- Electrical outlets and lighting
- Heating and cooling systems
If any utilities don’t work as expected, request repairs before settlement.

Common Issues to Look for During the Property Inspection
Some issues tend to appear frequently during a property inspection. These include:
- Water damage: Leaks under sinks, water stains, mould
- Broken fixtures: Non‑functional taps, faulty lights, damaged door handles
- Appliance issues: Broken ovens, dishwashers or air‑conditioning units
- Uncompleted repairs: Work that was poorly done or not finished
- Pest activity: Termite damage or droppings
- Property not cleaned: Excess rubbish, debris, or personal belongings left behind
When you spot issues, notify your solicitor or conveyancer immediately. They may negotiate repairs, a price reduction, or delay settlement until problems are resolved.
How to Prepare for the Final Inspection
Being prepared helps ensure you don’t overlook anything important. Bring:
- Your contract of sale
- The building inspection report
- A detailed checklist
- A camera or phone for documentation
- A trusted friend, family member, or building professional
Try to inspect the property during daylight hours, as natural light makes it easier to identify potential issues.
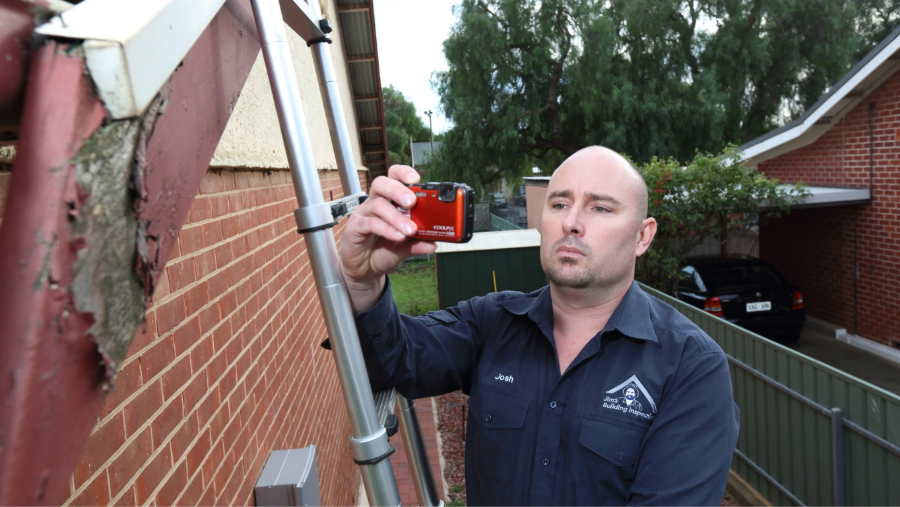
Should You Hire a Professional Inspector?
While buyers can conduct the final inspection themselves, hiring a professional inspector offers several advantages:
- They spot issues buyers often miss
- They understand structural and compliance matters
- They can advise on the severity of identified issues
- They can provide a report supporting negotiations
Professional building inspection services are particularly valuable if earlier reports highlighted concerns or if the property is older.
What Happens After the Final Inspection?
Once you’ve completed the final inspection before settlement, the next step depends on your findings:
1. Everything is satisfactory
You approve the property’s condition and proceed with settlement.
2. Issues are found
You may:
- Request repairs before settlement
- Ask for financial compensation
- Delay settlement until issues are resolved
- Request a re‑inspection after repairs
Your conveyancer or solicitor manages these negotiations on your behalf.
Conclusion
A final inspection before settlement is an essential part of safeguarding your investment and ensuring a stress‑free transition into your new home. By conducting a thorough inspection, reviewing your agreements, verifying repairs, and assessing utilities and fixtures, you reduce the risk of post‑settlement surprises. With careful preparation—and the support of a professional if needed—you can move forward with confidence, knowing your new property is exactly as agreed.
Frequently Asked Questions
Most buyers complete it 1–3 days before settlement, ensuring any issues can still be addressed.
You can request repairs, negotiate compensation, or delay settlement until issues are resolved.
Yes. If damage is found or agreed repairs aren’t completed, your solicitor can request corrective action or negotiate terms.
Refer to receipts, photos, and professional reports. Consider hiring a qualified inspector for verification.
A building inspection assesses a property’s structural condition and identifies defects or safety concerns.
They reveal issues buyers may miss, helping you make informed decisions and avoid costly repair bills.
Costs vary based on location and property size but generally range from $300 to $800.
Most inspections take 1–2 hours, depending on the property’s size and condition.
It typically includes property condition notes, defect photographs, and details of any unresolved issues or repair needs.
Yes—many inspectors include pest assessments or offer combined building and pest inspection services.
For maintenance, every 2–3 years is recommended, or sooner if you suspect damage.
Look for qualified inspectors, strong customer reviews, clear reporting styles, and experience with your property type.